My grandmother lived in London during the Blitz. Her stories always fascinated me as a child. I created a number of selective colourisation of iconic black and white images from period.

Call 01403 259879
Scanning Guide
How to scan your photo for the best result
Scanning your photo using the correct settings is a vital part of the restoration process. The better the starting point, the better the end result.
Clean the scanner glass
Firstly, clean the scanner glass, preferably with screen cleaner and a lint free cloth to remove any dust or fingermarks.
Turn OFF any auto adjustment settings
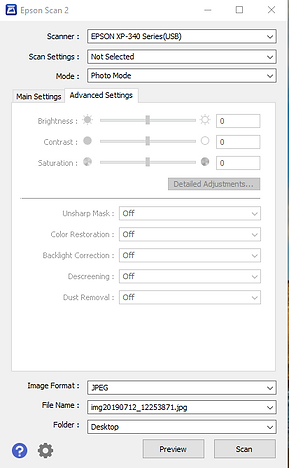
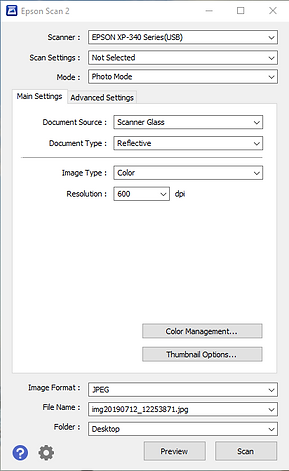
Virtually all scanners are set to auto adjustment setting. Check through the settings and turn auto adjustment OFF. The guide shown opposite is for an Epson XP-345, but most printer/scanners have a similar process.
Select the resolution
Set the resolution to a minimum of 600dpi. If the photo is small or if you think you may want to enlarge it, set the resolution to 1200dpi, which is the maximum quality.
Saving your scan
The final step is to save your scan as a JPEG and name it using your initial and Surname. Your scan is now ready to email.
4
That will take you back to your original screen, click on Advanced settings (or similar) and you will see AUTO SETTINGS are all OFF
1
Firstly open your scanning settings window. Click on the Colour Management button ( or similar depending on your scanner make and model)
2
At the top is the colour management bar with a drop down menu. Click on it and drop down to None.


None is selected and click OK.
3


5
Click back on main settings. Make sure your image Format is JPEG, colour is selected and 600dpi (dots per inch) is selected. 1200dpi should be selected if your photograph is small.